Connected to a Database
Begin by launching Visual Studio and creating a new Windows Application project called "VBdatabase". Once the new project has been created the first task is to connect to the Northwind database. Click on the View menu and select Server Explorer. The Server Explorer panel will appear on the left hand side of the main Visual Studio area:
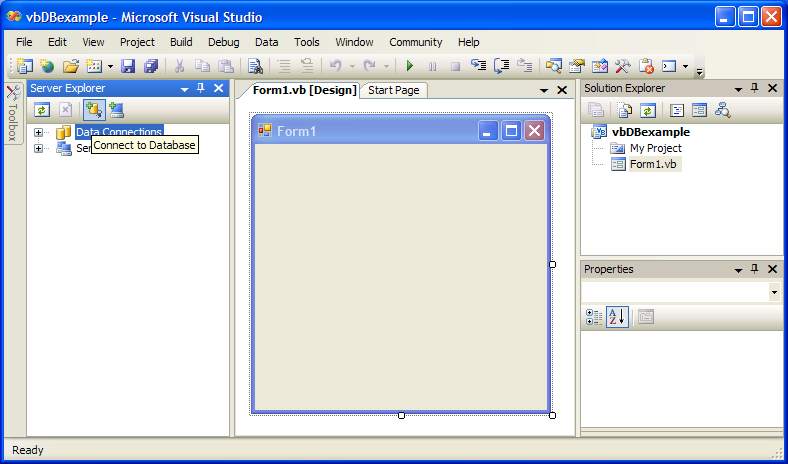
This panel allows you to browse servers on your network and locate databases. Click on the Connect to Database button (highlighted above). The Add Connection dialog will appear as follows:
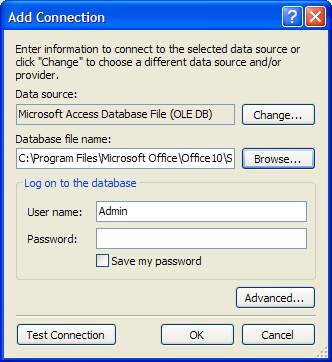
Change the Data source field to Microsoft Access Database if necessary. Click on the Browse button and locate the Northwind.mdb database. Once you have selected the Northwind database click on the Test Connection button to verify the database is accessible. Assuming the connection is successful, click on the OK button to apply the connection.
The database is now connected to the application and it is time to select a data source.
Selecting the Data Source
Once the database connection is established, the next step is to select the data source to be used in the application. To achieve this, select the Data->Add New Data Source menu option. The Data Source Configuration Wizard will appear as follows:
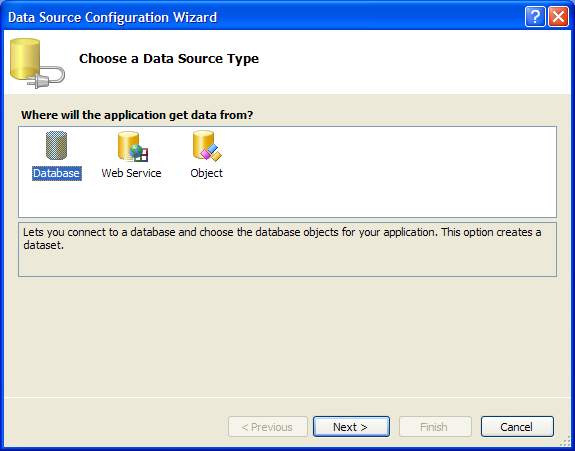
Since we are selecting data from a database, make sure that Database is highlighted in this dialog and click Next. Ensure that the Northwind database is listed in the following screen and pressNext to proceed.
A dialog will appear asking if you wish to move the database file to your project area. Click Yes. Finally the wizard will display the connection string (this the name used to refer to the database in your code). Accept the default suggestion and click Next. Finally, you will be asked to select the data objects you wish to access from your application. For the purposes of this example click theTables option and press Finish.
Linking Data Sources to an Application
The next step in our tutorial is to add some data fields to our application form. The first task is to display the Data Sources Panel by selecting the Data->Show Data Sources menu option. The data source panel will subsequently appear listing all the data tables and columns that are available to us. Click on the '+' sign next to the Customer table to unfold the list of customer fields:
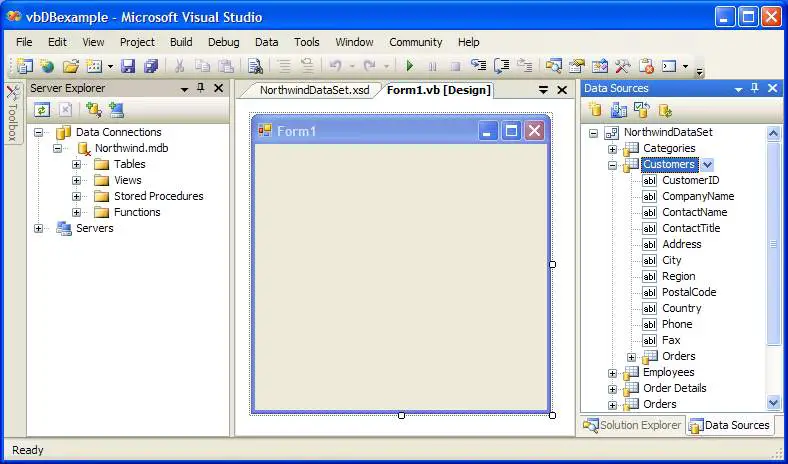
We are now ready to add some data columns to our form. Drag and drop the CustomerID, CompanyName, Address and Country fields onto the form so that they appear as follows:
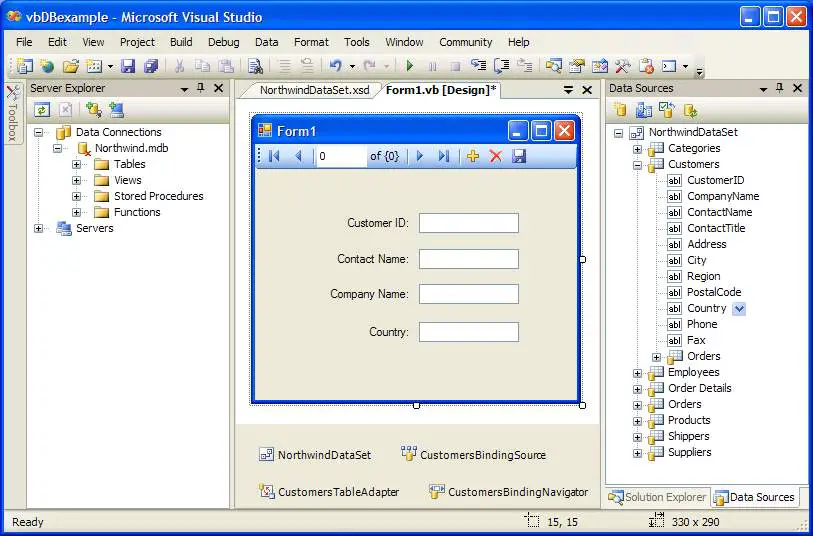
Once the data fields are added you will notice that Visual Basic adds a toolbar to the top of the form to provide navigation and the ability to add and remove records from the database. Press F5 to build and run the application. When the application starts the fields will be populated with data from the database. Use the toolbar to move through the records:

You have created your first database driven Visual Basic application.
Adding SQL Statements to a Visual Basic Application
The next step in our example is to add an SQL Query to our application. Click on the Company Name TextBox in the form and select the Data->Add Query menu option. In the Search Criteria Builderdialog change the New Query Name to France and click on the Query Builder button.
In the Query Builder dialog, scroll down the table until you reach the Country column. Scroll horizontally until you reach the Filter field and enter France as the filter criteria:
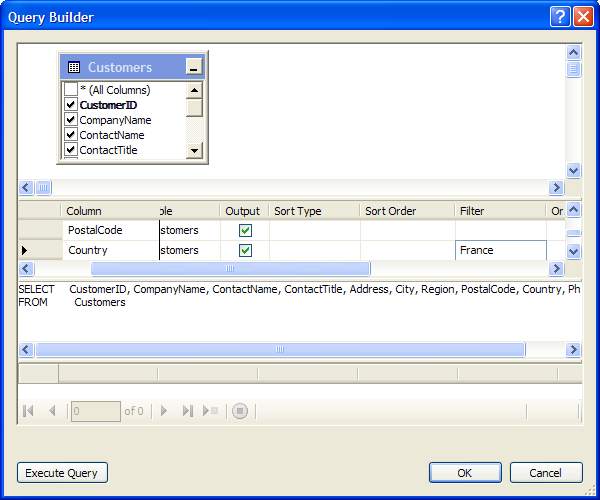
Click on OK. Visual Studio will generate the appropriate SQL statement to perform this query.
SELECT     CustomerID, CompanyName, ContactName, ContactTitle, Address, City,
Region, PostalCode, Country, Phone, Fax FROM Customers WHERE (Country = 'France')
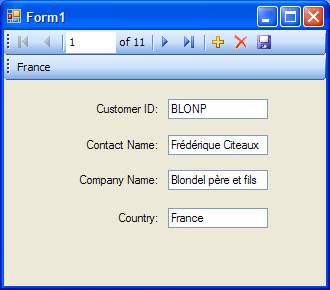
Press F5 to rebuild and run the application. An additional toolbar now appears labeled France which, when pressed, filters the database entries so that only customers in France are selected:
No comments:
Post a Comment